Creating DIY Easter gift hampers is a fun and creative way to celebrate the holiday. Whether you’re looking to surprise a loved one or simply enjoy a festive activity, making your own Easter gift hamper allows you to personalize the contents and add a special touch.
In this article, we’ll guide you through the process step by step, providing tips and tricks along the way. So let’s dive in and discover how to create the perfect DIY Easter gift hampers!
Understanding the Basics of DIY Easter Gift Hampers
Before we jump into the crafting process, it’s important to understand what exactly a DIY Easter gift hamper is. Simply put, it’s a collection of Easter-themed items and goodies packaged together in a basket or container. These hampers are often given as gifts to friends, family, or even co-workers during the Easter season. They can be customized to suit the recipient’s preferences and are a great way to show thoughtfulness and creativity.
What is a DIY Easter Gift Hamper?
A DIY Easter gift hamper is a handmade collection of items that are related to Easter. The items can range from chocolates and sweets to small toys and trinkets. The hamper is typically presented in a decorative basket or container and can be personalized to suit the recipient’s preferences and interests.

Why Choose DIY Over Store-Bought Hampers?
While store-bought hampers may seem convenient, creating your own DIY Easter gift hamper has numerous benefits. Firstly, it allows you to customize the contents to suit the recipient’s taste and preferences. For example, if you know that the person you are gifting the hamper to is a fan of dark chocolate, you can include a variety of dark chocolate treats in the hamper. Secondly, it provides the opportunity to add a personal touch and show your creativity. You can decorate the basket with ribbons, bows, and Easter-themed ornaments to make it truly unique. Lastly, making a DIY hamper can be a fun craft activity that you can enjoy with your family and friends. It’s a great way to bond and spend quality time together while creating something special.
When it comes to DIY Easter gift hampers, the possibilities are endless. You can include items such as Easter eggs, marshmallow bunnies, handmade crafts, scented candles, and even small potted plants. The key is to choose items that are meaningful and will bring joy to the recipient. Additionally, you can also consider adding a handwritten note or a personalized card to make the gift even more special.
So, why settle for a generic store-bought hamper when you can create a one-of-a-kind DIY Easter gift hamper? Not only will it showcase your thoughtfulness and creativity, but it will also bring a smile to the face of the person receiving it. Start gathering your Easter-themed items and get ready to embark on a fun and rewarding crafting adventure!
Gathering Your Easter Hamper Materials
Now that you understand the basics of DIY Easter gift hampers, it’s time to gather the necessary materials. Here are some essential items you’ll need to create a stunning hamper:
Choosing the Right Basket or Container
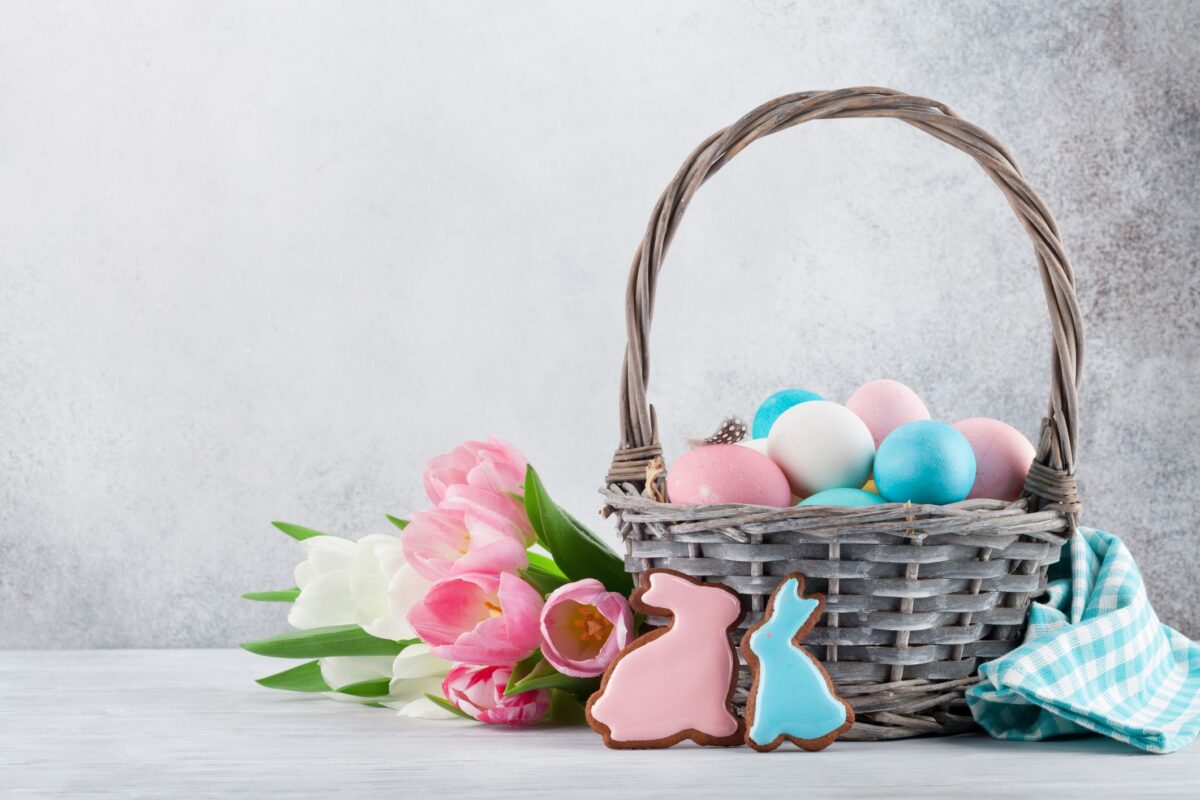
The first step is to select a suitable basket or container for your Easter gift hamper. Consider the size and shape that will best accommodate your chosen items. You can opt for traditional wicker baskets for a rustic feel or choose a decorative box or a colorful bucket to add a modern twist.
When selecting a basket, keep in mind the theme of your hamper. If you’re going for a more traditional Easter look, a wicker basket with a pastel-colored ribbon tied around the handle would be perfect. On the other hand, if you want to create a fun and vibrant hamper, a colorful bucket with Easter-themed stickers or decals would be a great choice.
Selecting Easter-Themed Items
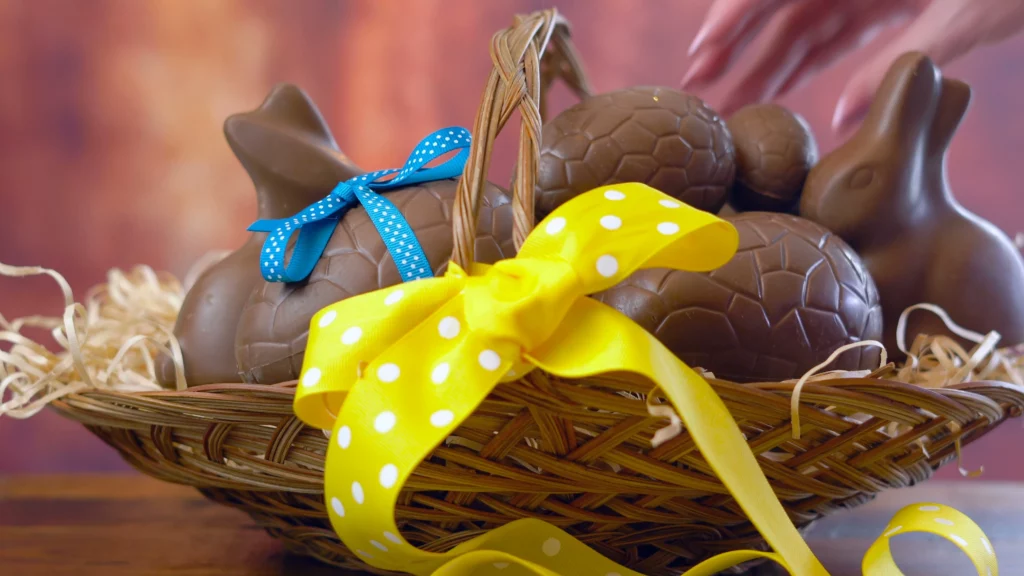
Next, think about the Easter-themed items you want to include in your gift hamper. Some popular choices include chocolate bunnies and eggs, marshmallow chicks, and colorful jelly beans. You can also consider adding small toys, such as plush rabbits or Easter-themed puzzles, to make the hamper more playful.
When choosing the Easter-themed items, try to mix different textures and flavors to create a diverse and exciting hamper. For example, you could include a variety of chocolate treats, from creamy milk chocolate bunnies to rich dark chocolate eggs. Add some fruity jelly beans for a burst of flavor and some fluffy marshmallow chicks for a touch of sweetness.
Incorporating Traditional Easter Foods
In addition to the sweet treats and toys, it’s a nice touch to include traditional Easter foods in your hamper. This can include hot cross buns, homemade Easter cookies, or even a small bottle of sparkling apple cider. These food items add a festive touch and make the hamper more enjoyable for the recipient.
When it comes to incorporating traditional Easter foods, you can either make them yourself or purchase them from a local bakery or specialty store. If you have the time and enjoy baking, making your own hot cross buns and Easter cookies can add a personal touch to the hamper. However, if you prefer convenience, there are plenty of delicious options available for purchase.
Remember to package the food items securely to ensure they stay fresh and intact. You can use food-safe wrapping paper or place them in small containers with lids to prevent any mishaps during transportation.
Assembling Your DIY Easter Gift Hamper
With all your materials gathered, it’s time to start assembling your DIY Easter gift hamper. Follow these steps to create a visually appealing and secure hamper:
Arranging Items for Visual Appeal
Begin by arranging the larger items in the back of the basket or container, creating a backdrop for the smaller items. This will help create depth and visual interest. Place taller items towards the center and shorter items towards the edges. You can also add some colorful shredded paper or tissue paper as filler to give your hamper a finished look.
Imagine the joy on your loved one’s face as they open their Easter gift hamper and are greeted with a delightful arrangement of goodies. The careful placement of items not only adds aesthetic appeal but also enhances the overall experience. By strategically arranging the items, you can create a sense of anticipation and excitement, making the gift-giving moment even more memorable.
Securing Items for Safe Transport
Once you’ve arranged all the items, it’s important to secure them properly to prevent damage during transport. Use tissue paper or bubble wrap to wrap fragile items and hold them in place. You can also use ribbons or decorative tape to secure larger items or groups of items together. This will ensure that everything stays in place and arrives in perfect condition.
Imagine the peace of mind knowing that your carefully curated Easter gift hamper will withstand the journey to its recipient. By taking the extra step to secure each item, you can rest assured that your thoughtfully chosen gifts will arrive intact and ready to be enjoyed. The added layer of protection not only safeguards the items but also adds an element of surprise as the recipient unwraps their gift, revealing the meticulous attention to detail that went into its preparation.

Personalizing Your Easter Gift Hamper
Adding a personal touch to your DIY Easter gift hamper can make it even more special. Here are a few ideas to customize your hamper:
Adding a Personal Touch with Handmade Items
Create handmade items to include in your hamper, such as a hand-knitted bunny or personalized Easter eggs. These thoughtful additions will showcase your creativity and add a unique element to the gift. You can also include a handwritten note or a photo of the recipient to make the hamper extra personal.
Writing a Heartfelt Easter Message
Include a heartfelt message or a simple Easter greeting card in your hamper. Take the time to express your well-wishes and let the recipient know how much they mean to you. This personal touch will make the gift even more meaningful and show your thoughtfulness.
Imagine the joy on your loved one’s face when they open the Easter gift hamper you’ve carefully put together. Now, let’s take personalization to the next level by adding a couple more ideas to make your hamper truly one-of-a-kind.
Consider including a small jar of homemade jam or jelly, made with love and using the recipient’s favorite fruits. This delightful addition will not only add a burst of flavor to their Easter breakfast but also show them the effort you put into creating a gift that caters to their taste buds. You can even attach a handwritten label with a sweet message, making it a truly personalized treat.
Another way to personalize your Easter gift hamper is by including a small booklet of coupons. These coupons can be redeemable for various activities or favors, such as a homemade dinner, a movie night, or a day of pampering. This thoughtful gesture allows the recipient to enjoy special moments with you throughout the year, creating lasting memories and strengthening your bond.
Wrapping and Presenting Your Easter Gift Hamper
After putting in all the effort to create the perfect DIY Easter gift hamper, you want to ensure it is wrapped and presented beautifully. Here are some tips to consider:
Choosing the Right Wrap for Your Hamper
Selecting the perfect wrapping paper or fabric for your Easter gift hamper is an important step in the presentation process. Consider the theme of your hamper and choose a wrap that complements it flawlessly. If you’ve created a traditional Easter basket filled with colorful eggs and chocolates, opt for pastel colors to enhance the festive spirit. On the other hand, if your hamper is bursting with spring-themed goodies, embrace vibrant patterns that capture the essence of the season. Remember, the wrap is the first thing the recipient will see, so make sure it sets the right tone for the surprise that awaits inside.
Once you’ve chosen the ideal wrap, it’s time to add those extra special touches. Secure the wrap with ribbons or bows, adding an extra layer of elegance and charm. Consider using ribbons in complementary colors or patterns to create a visually appealing contrast. And don’t forget about the power of a well-placed bow – it can instantly elevate the overall presentation of your Easter gift hamper, making it even more enticing to open.
Delivering Your Easter Gift Hamper
Finally, it’s time to deliver your Easter gift hamper and share the joy with your loved ones. When deciding how to deliver the hamper, consider whether you’ll be giving it in person or shipping it to the recipient. If you’re planning a personal delivery, take a moment to schedule a time when the recipient will be available to receive the gift. This ensures that the surprise is not spoiled and allows for a truly special moment of exchange.
On the other hand, if you’re shipping the hamper, it’s crucial to take extra precautions to ensure it arrives in pristine condition. Pack the hamper securely, using sturdy boxes and additional padding to protect the contents during transit. Consider using bubble wrap or packing peanuts to safeguard delicate items and prevent any shifting or damage. Remember, the goal is to have the recipient open the hamper and find everything exactly as you intended – a delightful assortment of Easter treats and goodies.
Creating DIY Easter gift hampers is a wonderful way to celebrate the holiday and show your loved ones how much you care. With these tips and tricks, you’ll be able to craft the perfect hamper that is sure to bring joy and cheer. So gather your materials, let your creativity run wild, and enjoy the process of creating your very own DIY Easter gift hampers!
Related: Unique Easter Gift Hampers Ideas for Kids and Adults